I know I should've posted about this days ago, but homework and SATs and my 18th birthday got in the way. I didn't take any photos of the construction because I was rushing to finish the entire dress in two weeks (and don't forget I was making it while also juggling homework and practice for the Senior Play). I didn't use a pattern, but merely went with the vague directions I saw at other blogs, which basically were to sew a giant tube of fabric, and attach shoulder straps and sleeves with drawstring casings everywhere. So here I thought, oh this will be easy-peasy! I got the tube of fabric down and then it took me nearly a week to fiddle with the shoulder straps: since I don't own a dress form, I had to keep trying the dress on myself which considerably slowed me down.
I made the tube part of this dress out of 4 yards of this wonderful fabric, which cost only $2 a yard. I got six yards of the fabric, and used the extra for making the sleeves. Which STILL had me with leftover fabric, so I can always attack this dress with ruffles or something. I actually made a neck ruffle for this dress but I wasn't crazy with how it turned out so I removed it.
The dress has two sleeve puffs, with a cuff made of double-fold bias tape on the last puff. The drawstring on the neckline is only in the front, as I tried to make the gathers in the back a little more fitted. There is also a drawstring at the waist, and on the one sleeve puff. The dress has pocket slits in the side so that I can access my pockets. I hemmed it with a slight train in the back, although I wasn't accustomed to maneuvering crowded hallways without anyone putting their dirty paws on my train.
I also did my hair for this, not using a STRAND of hair that wasn't mine. I began by taking a shower the previous day, and braiding my hair into small braids all over except for an area in the back which was to become the curls. Halloween morning, I let out all the braids, then brushed them out. I took a piece of black netting, rolled it up, and pinned it above my hairline, then draped my hair over it. I continued to tease and drape and pin like a mad woman. Then I placed the ribbon in my hair (I made that too!), pinned it, and teased/ draped/ pinned the hair leftover from the sides over it. The trickiest part was making the curls, since I had to curl my hair with the curling iron and then carefully slide out the curl, trying to keep it intact while I pinned the living daylights out of it. I made two curls on each side, and this must've taken me the better part of an hour. Lastly, I stuck 3 black plumes in my 'do (these were from those wonky New Year's Eve tiaras) and two rosy artificial flowers. In these pictures I only have one flower, because the other fell off as I was walking to school.

 |
| My tousled hair after walking over a mile to and from school. |
 |
| My black bra strap is showing...I worried that if I didn't wear a bra with this dress, I'd look like a shapeless marshmallow. |
Possibly the most frustrating thing is that the bolts of fabric at Wal-Mart are properly labeled, but the labels are covered by enormous orange price stickers! I mean really, you can't put the price sticker maybe a little to the side, so I can actually read this important information? No?
I bought a yard of this GORGEOUS stiff pink satin for $2 to make the sash and the headband. I wasn't sure if the headband was period correct, but I did see similar matching headbands in some paintings.
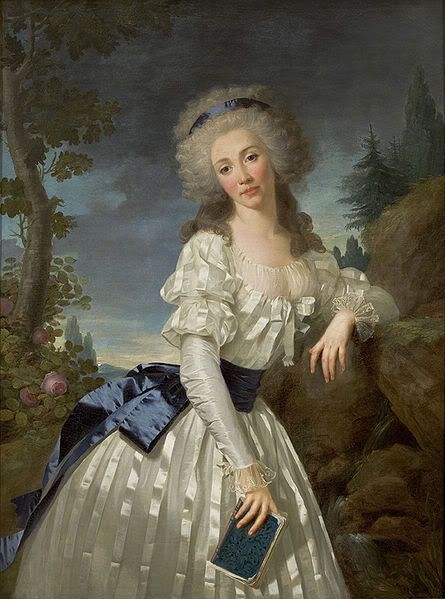 |
| Antoine Vestier, Portrait of a Lady with a Book, Next to a River Source, ca 1785 | |
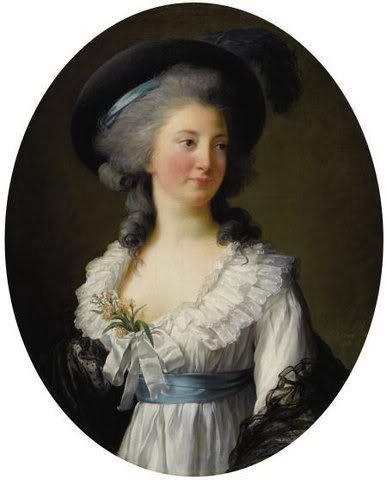 |
| Vigée le Brun, Portrait of Izabela Lubomirska (Elzbieta Czartoryska) The Blue Marquise, 1782 |
|
To make the sash, I cut from selvage to selvage twice, then sewed both lengths together, then folded and sewed again to make a tube, then sewed the edges inside to make it all clean and pretty. Maybe my masterpiece on Paint will clear it up for you:
 |
| Yeah...totally understandable right? |
I realized that I also needed another petticoat as multiple petticoats were the norm in the 18th century and because my dress needed more "poof". I bought a little more than a yard of this mystery fabric for about $2. I think in total I only spent $16 on fabric, then about $6 on trims. Talk about affordable! I made the second petticoat in the same manner I made my first, except by now I was all out of twill tape so I used some beige yarn I had leftover from another project as ties.

I was a victim of the snowstorm that attacked the Northeast a few days before Halloween. Subsequently, our Town Halloween Parade was canceled (I wanted to compete in the costume contest!) and, most unfortunately, on Halloween, as I was walking to school in my costume, I slipped on a patch of black ice and fell onto my left elbow. My right hand was really scratched up, and it's only started scabbing now. I gathered all my books and papers, and crawled to the cars that were parked on the curb. For some reason, that whole area was covered in ice, even the cars. I held onto the icicled car door handles and kind of rag doll dragged myself for about half a block. I didn't even notice I was bleeding from my right hand until I saw red stains all over the pocket slits of my dress and all over my school papers. And what was worse, when I got to school, I had just
missed the school's costume contest by a few minutes! And what was even worse than that but really not as bad, I realized I couldn't bend my left elbow. I guess when I landed on the ice, and when my books landed on my elbow, something inside moved. When I got to school I couldn't bend my arm up to fix my hair, nor could I straighten out my arm. Eventually I went to the school nurse for some ice and aspirin, but it took a whole week for my left arm to regain its bendability. Every time I tried to straighten out my arm, it felt like there was a rubber band inside that was super tense and couldn't stretch any more. But now its fine. I'm right-handed anyway.