Simple Apron with Gathered Ruffle & Pocket
I had just enough plaid cotton fabric left over from my recent Edwardian shirtwaist project that I was able to squeeze out a cute apron from the scraps.
The apron was very quick to make, taking about a day from ideation to completion, and the gathered ruffle, bias details, and pocket add a touch of interest that my usual apron projects lack.
This apron was inspired by many worn in early 1900s photographs of women and girls in Portugal. Besides the traditional woven wool aprons of the Minho region, and Richelieu embroidered aprons of Nazare, simple aprons appear in many photographs in prepared photos and candid photos. Notably, these aprons are quite long, reaching almost to the hem of the dress, and quite narrow, presumably only the width of the panel of fabric. They appear to have no decoration, or a few pintucks toward the bottom, a ruffle or flounce at the hem, a pocket, or a combination of these. These aprons appear in the context of daily work/outdoor labor.
 |
| Figueira da Foz, Portugal |
 |
| Woman with (laundry?) basket, Portugal |
 |
| Porto, Portugal |
 |
| Outdoor market in Porto, Portugal |
 |
| Maia, Portugal 1913 |
 |
| Matosinhos, Portugal 1908 |
 |
| Coimbra, Portugal |
My design was limited by the fabric I had. The ruffle ended up 1.25 x the width of the apron, which was a bit scant but not far off from photographed examples. My pieces were as follows, plus a few bias bands and a pocket:
Apron: 80 cm width x 63 cm length
Ruffle: 105 cm x 17 cm
Waistband (crossgrain): 5.5 cm x 51 cm
Ties x2 (crossgrain): 5.5 cm x 60 cm
I started by hemming the sides of the apron and the sides and bottom of the ruffle, using a 3/8" hem allowance. The ruffle was gathered and attached wrong sides together to the apron, and the join was covered by a 1" strip of bias.
The excess of the bias strip was trimmed and whip stitched down to the wrong side of the apron. I just didn't feel confident navigating this small area with my sewing machine!
I then gathered the top of the apron to be 14" wide and attached it to the waistband. The waistband was a few inches longer than half of my waist, but I retained the extra to make up for the ties potentially being too short.
The ties were hemmed with a 3/8" hem, but the existing bias edge on them was a bit tricky to work around. Somehow I got that tight bias corner mitered, but it's far from neat work. The other end of the ties was pleated and sewn to the waistband. The remainder of the waistband was folded down and whip stitched. For a more detailed breakdown of this process, check out my pinafore apron tutorial.
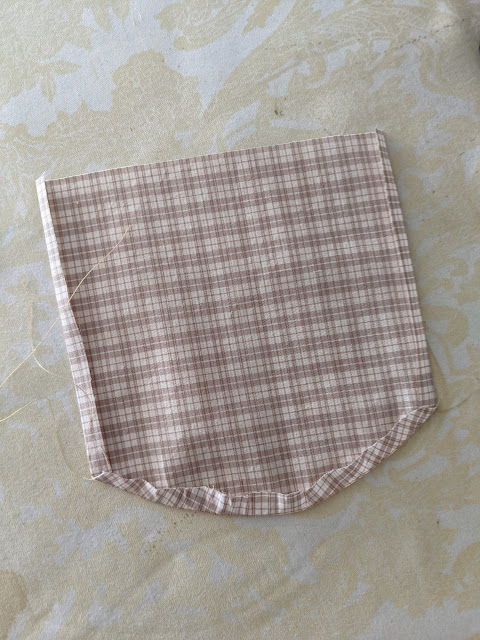
I waited until the apron was functionally complete before I worked on the pocket so that I could better determine the pocket size and placement. I chose a simple patch pocket with a curved bottom and freehanded the shape.
To get a nice curve at the bottom of the pocket, I stitched 1/4" away from the raw edge and then used the stitching as a guide to press down the curve. I also pressed the side edges of the pocket in by 1/4".
The pocket was stitched on my machine with the upper corners reinforced. I'm not worried about the raw edge of the pocket on the inside, as this vintage cotton shirting is tightly woven and doesn't fray easily.
The finished apron is delightfully lightweight and full coverage. With its long ties and wide front, I can lend this apron to a size Medium person. Overall, it was a great use of these fabric scraps (by this part of the yardage, there were set-in stains and fading) and will bring some fun variety to my growing collection of historic aprons.
Hooray for a quick palette cleanser project! Somehow I still have some scraps - perhaps these will become bedding in a future mini dollhouse...


