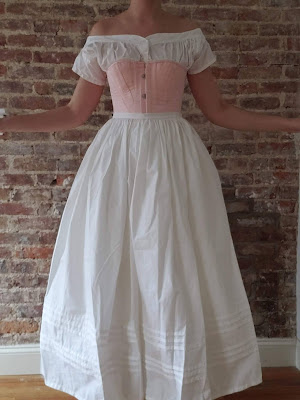
Victorian/Edwardian Kitchen Apron Tutorial & Pattern


I designed this apron by looking at examples of similar aprons in drawings, books, and magazines from the 1890s-1900s. Often referred to as a nurse's apron or kitchen apron, the bib and full skirt help protect your garment from dirt and grime. We might refer to a garment like this as a "pinafore apron" today!
This style of apron is perfect for a Downton Abbey cosplay or Alice in Wonderland cosplay. It's a neat and functional apron for use in modern kitchens, too!
This apron is an easy project that can be accomplished in a few hours. It can be customized with tucks, ruffles, lace insertion, or embroidery, and it's suitable for hand sewing, machine sewing, or a combination of the two.
Materials required:
- 2 yards of 45” fabric
- 2 buttons
- Matching thread
Pattern pieces:
All pattern pieces include ¼” seam allowance
Bib: Cut one 9.5 inches x 7.5 inches
Straps: Cut two 3.5 inches x 33 inches
Waistband: Cut one 1.75 inches x 22.5 inches
Waistband facing: Cut one 1.75 inches x 22.5 inches
Ties: Cut two 2.5 inches x 30 inches
Skirt: Cut one 34.5 inches x 44 inches, and cut two 34.5
inches x 14.5 inches (this will vary if you’re using narrower or wider fabric;
generally, avoid having a seam down the center front; the apron skirt should be
at least 1.5 yards wide).
Cutting layout:


Directions:
1. Assemble the apron skirts:
a.
Pin and sew together the side seams of the skirt
pieces. If you’re using 60” wide fabric, you won’t need side seams; you can
just use one breadth of the fabric from selvedge to selvedge.
b.
Flat fell the side seams, felling towards the center
back.
c.
Fold up and press ¼” at the bottom of the apron;
then fold up and press 3” to make a 3” hem. Stitch.
d.
Fold, press, and stitch a ¼” hem on the side
edges of the apron.
e.
Mark the center front of the apron. Sew two rows
of gathering stitches across the top of the apron.
f.
Mark the center front of the waistband pieces.
Take one waistband piece and press down ¼” on the short ends.
g.
Right sides to right sides, match up the center
front of the apron with the center front of the waistband. Match up the side
hems of the apron with the ¼” fold of the waistband. Adjust the gathers of the
apron to fit the waistband, pin, and stitch.
h.
Press the seam towards the waistband. Trim seam
allowance.
2.
Assemble the bib and straps:
a.
At the top edge of the bib, fold down and press ¼”.
Fold down and press 1.25” to create the hem at the top of the bib. Stitch and
press.
b.
Pin the straps to the wrong side of the bib, lining
up the bottom of the straps with the bottom of the bib. Stitch and press the
seam towards the straps.
c.
Press down ¼” on the long sides of the straps.
d.
Fold the straps in half and pin along the long
edge, matching up the folded down ¼” seam allowance. Stitch and press.
e.
Topstitch along the folded edge of the straps.
f.
Mark the center front of the bib. Run two lines
of gathering stitches along the bottom edge of the bib.
g.
Match up the center front of the waistband with
the center front of the apron. Determine how wide you want your gathered bib to
be. Gather the bib to fit the measurement you’ve chosen (my bib was gathered
down to 6.5” wide) and pin it to the waistband. Stitch and press. Trim seam
allowance.
3.
Assemble the apron:
a.
Fold, press, and stitch a narrow hem on the long
edges of the apron ties. On one of the short edges of the apron ties, fold,
press, and stitch a ¼” hem.
b.
Match up the right sides of the unhemmed, short
edge of the apron ties with the right side, short edge of waistband. Make a
pleat in the center of the ties. Pin, stitch, and press.
c.
Match up the long edge at the top of the
waistband facing to the right side of the waistband. Pin and stitch. Trim seam allowance.
d.
Press waistband facing down, wrong side to wrong
side, over the waistband. Fold under ¼” on the remaining edges of the waistband
facing. Topstitch or hand stitch facing to waistband.
e. Try on the apron, cross the straps and determine where the straps should button to the waistband. Sew buttons onto the straps and corresponding buttonholes on the waistband.
Variations:
- Sew hems and seams by hand
- Sew hems with a hemstitch
- Add tucks or lace insertion to the bib and/or skirt
- Sew the straps to the waistband instead of using buttons and buttonholes
- Lengthen the ties
- Add a pocket to the apron skirt
Fitting Tips:
- Adjust the apron to your proportions by lengthening/shortening the waistband, straps, and bib.
Sources:

McCall’s Spring & Summer Pattern Catalog, 1907

Unknown source, found on Pinterest

Home Dressmaking: A Complete Guide to Household Sewing,
1892: https://archive.org/details/homedressmakingc00myer/page/130/mode/2up?q=apron
Photos of domestic servants: https://www.pinterest.com/laancienregime/edwardian-clothing-domestic-servants/