Shoe Bow Tutorial - Make Your Shoes Look Victorian!

Ah, the struggle of acquiring a shoe collection that spans as many decades as your historical wardrobe! While I love all of the gorgeous historical shoes American Duchess designs, space (tiny NYC bedroom!) and funds limit me from having a comprehensive collection.
Despite that, I've discovered an easy, quick, and cheap (the crafting trifecta!) way to transform basic ballerina flats into passable mid-19th century shoes.
HALLMARKS OF VICTORIAN SHOES
Just like us, the Victorians had a range of shoe types from which to choose from, each suited to a particular activity or purpose. I needed something to wear with my 1830s and 1840s ballgowns, and chose a delicate slipper style shoe that was worn for this purpose in the mid-19th century.
A quick examination of mid-19th century formal slippers reveals some common elements:
- a long, straight tongue
- a square or gently rounded toebox
- flat soles
- ribbons, fringe, bows, etc decorating the shoes
- solid colors, especially neutrals like black and ivory
| Evening Slippers, 1845-1865 |
| Evening Slippers, 1830s |
| Evening Slippers, 1835-50 |
| Evening Slippers, 1835 |
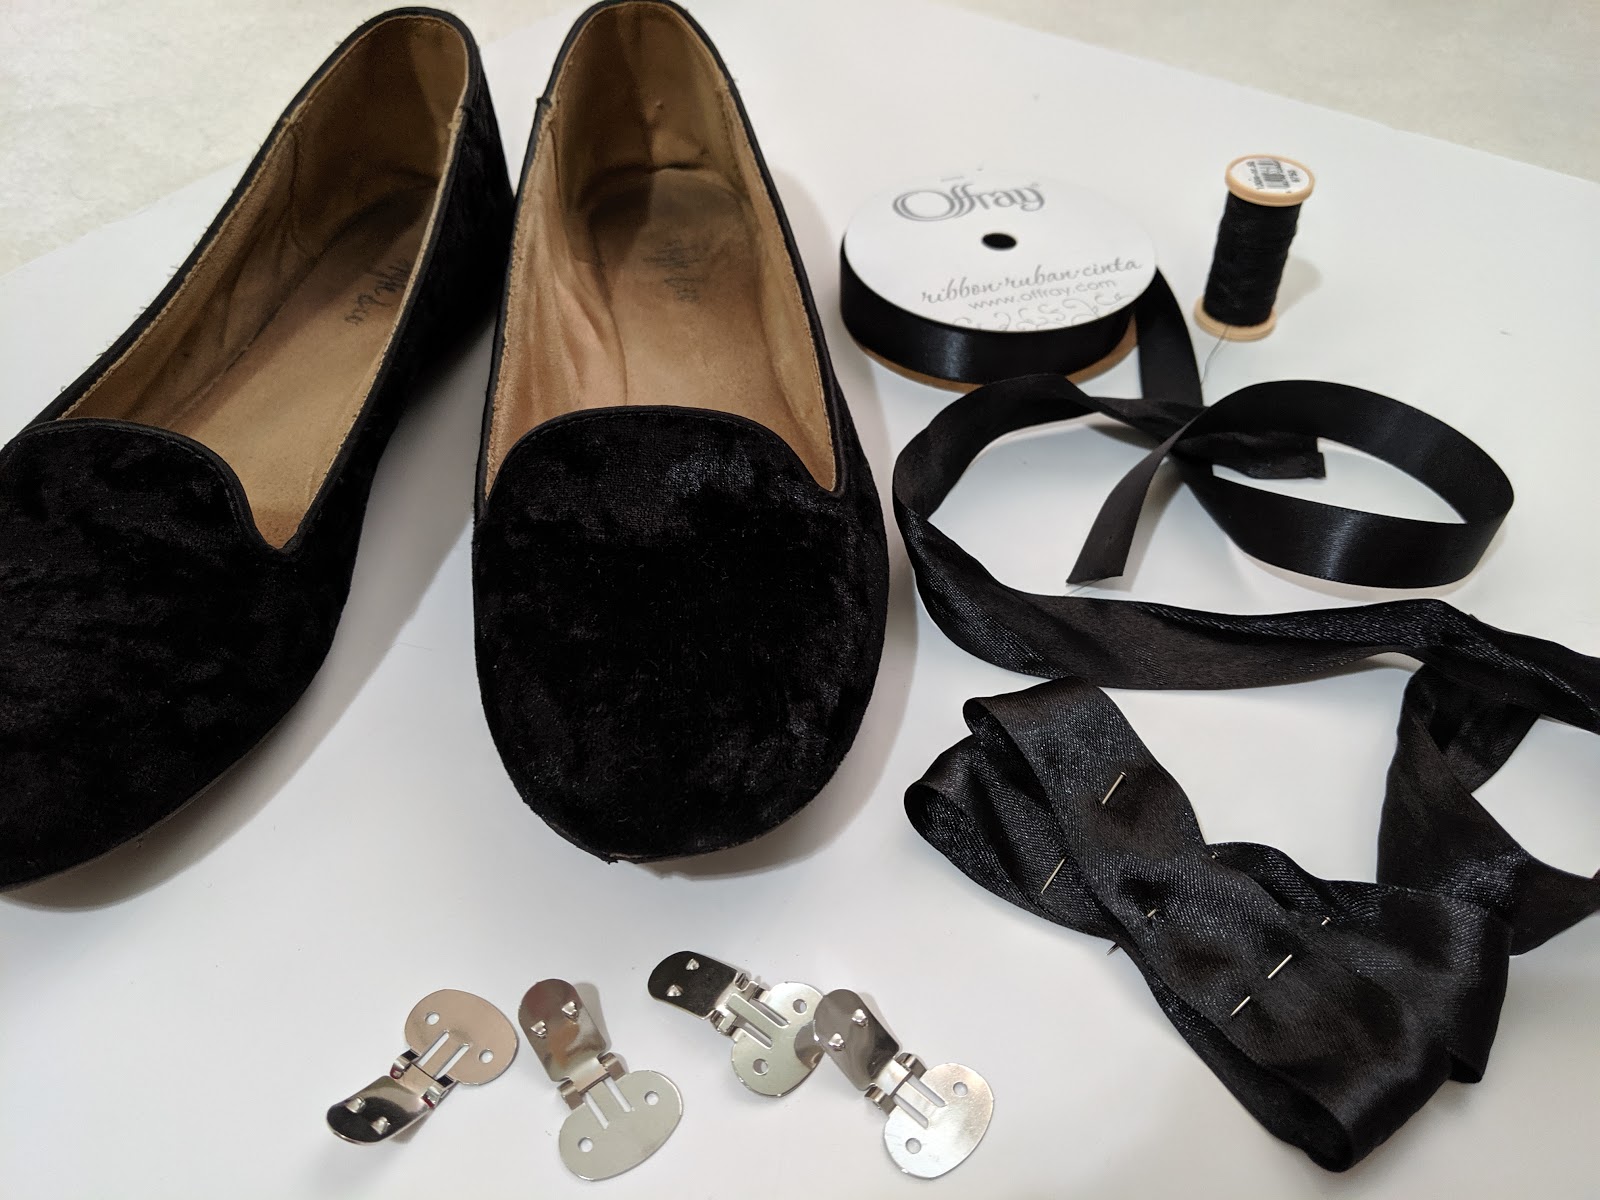
You will need:
- a pair of flat shoes in your size, preferably with a long tongue; I used a pair of black faux-velvet flats
- 1 yard of 1" wide ribbon that coordinates with your shoes
- scrap of 0.5" wide ribbon that coordinates with your shoes
- matching thread
- scissors
- pins
- 2-4 shoe clips
STEP 1:
Take a length of the 1" wide ribbon and stack it in a figure 8 to make a 4-loop bow. The ends of the ribbon should be in the center of your bow. Baste through the center of the bow.

STEP 2:
To add dimension to your bow, gently twist the 4 loops apart. When you're pleased with the shape of the bow, pin and baste the loops in place.

STEP 3:
Take the 0.5" wide ribbon (or the 1" wide ribbon folded in half) and secure it to the back of the bow. Wrap the ribbon around the front of the bow, and overlap the raw edges of the ribbon at the back of the bow. Fold under the top raw edge and stitch down.


STEP 4:
Place your completed bows on your shoes to determine the best placement for the shoe clips. I decided to sew 2 shoe clips onto each bow for extra security! Stitch the shoe clips to the bows, being careful not to sew through all the layers of the bow loops.