Burdastyle 09/2016 Blouse 122
I have a few Portuguese editions of Burdastyle magazine, which I purchased early on in my sewing journey. I admired Burda's modern, intricate designs and especially their interesting fabric choices... though I was intimidated by the scant instructions in a language I'm not as fluent in as I'd like to be. Every once in a while, I'd page through my magazines and flag patterns I was eager to try when I felt ready. And in October 2022, I felt ready!
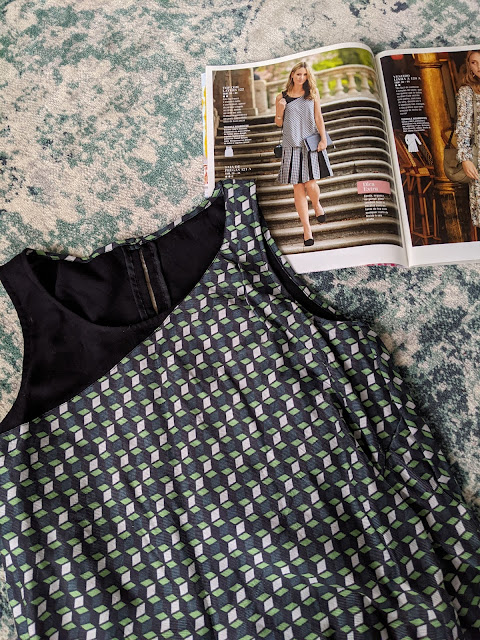
My first Burdastyle make was this deceptively tricky layered blouse #122 from their September 2016 issue (an excellent issue - I've traced out many of the patterns in this one!). I was inspired by the choice of a geometric print for Burdastyle 09/2016 122 - they tend to use lots of geometric prints and I find these fabrics so dynamic, interesting, and timeless. I found this MC Escher cube-style green/navy/white/black printed rayon twill at Fabric Mart Fabrics ($6.80/yard) and paired it with a black Halston rayon crepe ($5/yard), also from Fabric Mart Fabrics. This blouse is a great scrap buster and used a minimal amount of fabric. The total cost of materials was about $10.
Tracing out the pattern was logical and somewhat therapeutic - but I enjoy tracing patterns anyway! I made up the smallest size, a 36. When it came to the instructions and order of operations, I struggled...
The gist of this blouse is that there's an under portion (the black crepe) which extends to about the underbust, and an overlay which is topstitched to the under layer. The main issue I had was the order of operations at the right armhole and right neckline: should I finish the neckline/armhole edges first, and then topstitch the overlay, or sew on the overlay and then finish off the neckline/armhole edges?
I used a combination approach. At the neckline, I first sewed on the handmade rayon twill bias binding and then top stitched the overlay (this was fussy). At the armhole, I top stitched the front part of the overlay (having the top edge of the back overlay already finished) and then applied the bias binding (this was also fussy).
Other construction notes:
- I stay-stitched all the neckline and armhole edges prior to sewing up the blouse to prevent stretching
- I finished the under layer seams with rayon seam binding, as the crepe was too thick for nice french seams and at the time I didn't have a serger
- I used French seams for the overlay
- I chose to use contrast bias binding for the neckline, armholes, and button loop
Aside from the head-scratching construction, the other questionable aspect of this garment is the fit. A few issues:
- The black crepe isn't drapey enough for the unfitted under layer, so it sticks out weirdly at the underbust. I plan to thread a narrow elastic through the bottom hem of the under layer to improve the fit and drape.
- I don't think the bias cut of the front overlay is flattering on me - maybe it's due to the fabric, or the stiff underlay, or maybe no reason at all, but I find the fabric sticks out and pools around my midsection.
I'm truly proud of myself for undertaking many new techniques with this blouse, and the final garment is a visually interesting addition to my work wardrobe. Though it doesn't look so elegant when paired with its matching skirt, as the Burda model does. 🤣
Have you ever used a Burdastyle magazine pattern? What was your experience like?


